In this blog entry I will continue my new Amiga 3000 build.
Please review Part 1 of the build so you know what has been done so far before diving in here, as I am just continuing straight on for this Part 2.
So let's dive in.
One of the frustrating things about the Picasso IV in the A3000 is that it doesn't pass through the initial Superkickstart 1.4 scandoubled screenmodes from the native output. This means that the initial boot screen, etc are simply not visible when booting.
This is not a problem if I want to boot AmigaOS 3.1 as it is the default (and it can see the Picasso IV). But if I want to boot Workbench 1.3 I need the superkickstart boot screen to select the other kickstart to boot from. I also have to use the native Amiga video output as the PicassoIV is not recognised by Kickstart 1.3 (requires at least 2.0 kickstart). This means I have to manually move the VGA cable between the native VGA port on the A3000 and the VGA output on the Picasso IV to do this.
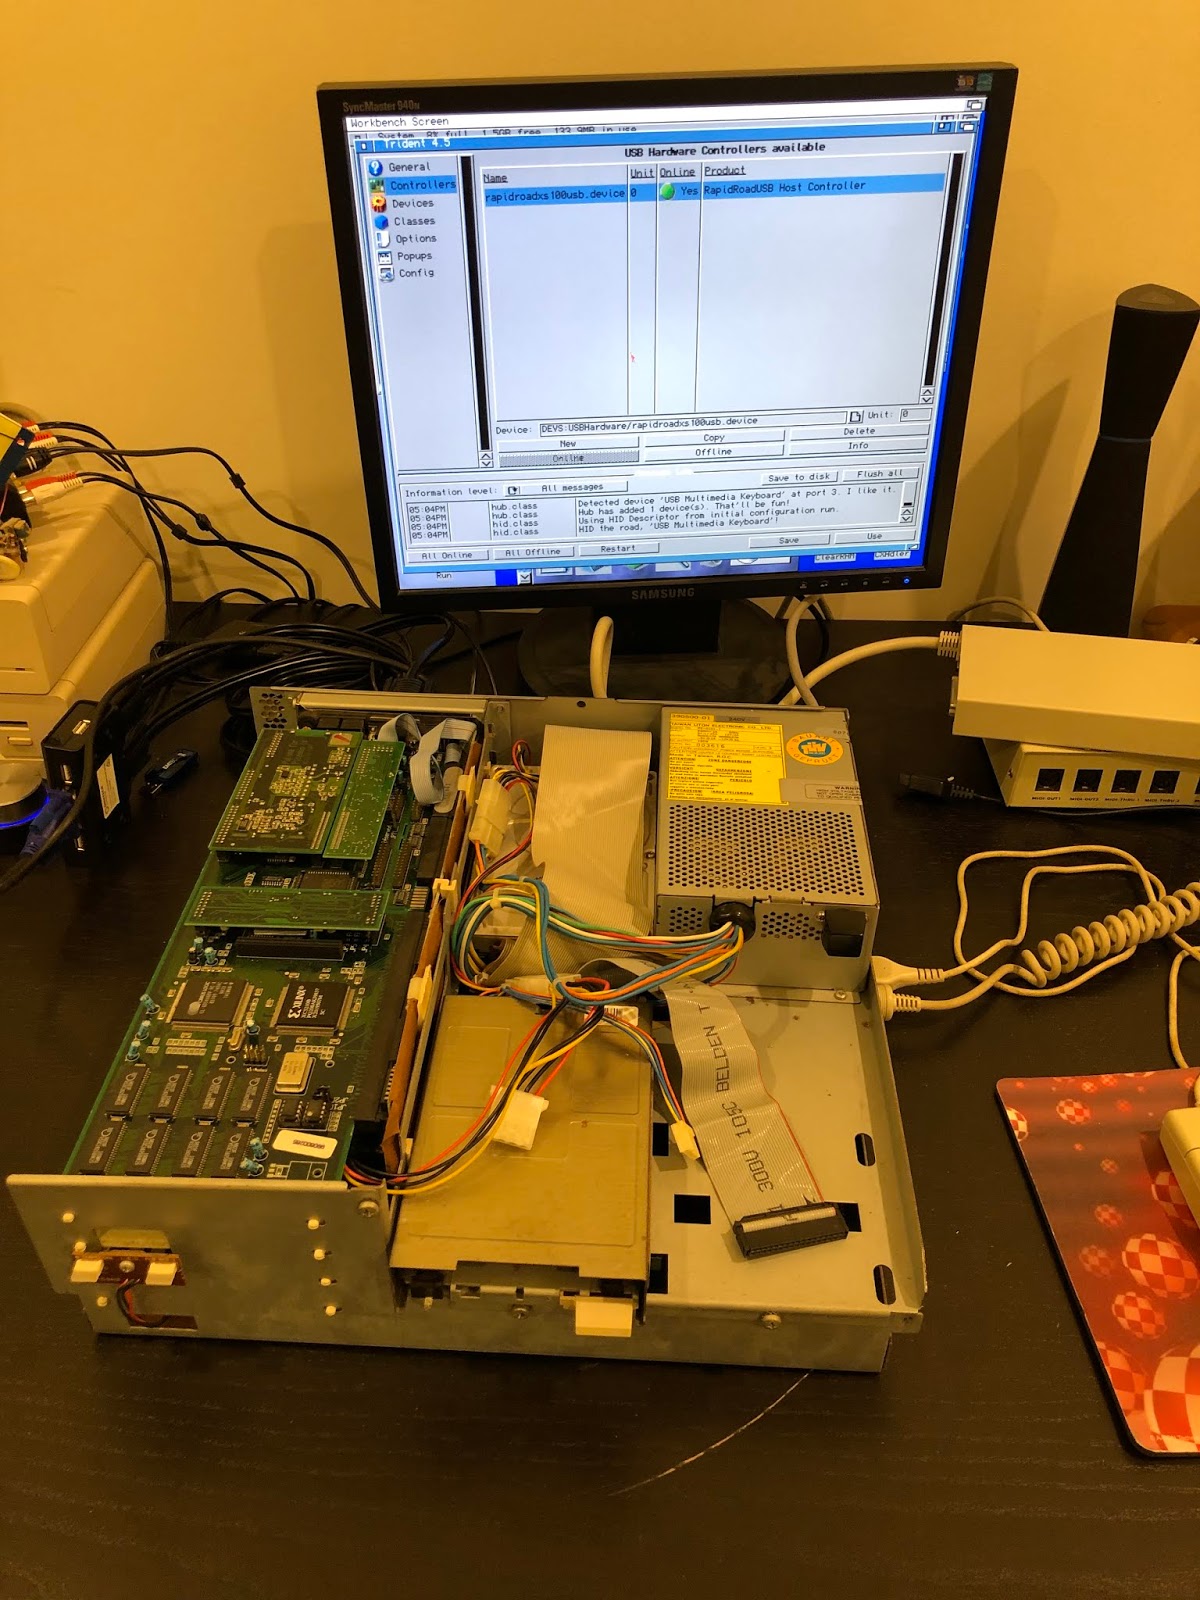
As a fix, I got a VGA switchbox from my local Jaycar electronics shop, which requires USB power to function. Fortunately I have the RapidRoad USB installed in the A3000, with a connected powered USB hub. So I connected the USB power to it, and connected the output from the A3000 native VGA and Picasso to the switcher, and then connected it to the TFT screen.
So now I can switch easily at any time between the two outputs.
I identified the unknown USB card from
Part 1 as a Thylacine USB card. I did some research and found out it didn't work with USB sticks, which is a non-starter. I tested in Poseidon and confirmed that USB sticks didn't work - btw finding a Posiedon compatible driver for Thylacine is a real pain:
I decided to take the X-Surf 100 and RapidRoad USB expansion from my A2000 to use in the A3000, since the A2000 has issues with the mouse port still.
That done, I hit a snag when plugging in my Individual Computers X-Surf 100 and RapidRoad USB expansion to the A3000. Namely the red screen on boot...I traced it to the DKB3128 memory card and removed it.
Without it, the system then booted as normal. I decided to swap the BigRam expansion in my A4000D (256MB) with the 64MB DKB 3128 Zorro card.
With that done, I now have heaps of memory on the A3000, and it plays nicely with the X-Surf 100 and RapidRoad to allow the system to boot.
The 64MB DKB memory card works fine in the A4000D as well. It is a shame to lose some memory in the A4000D but to be honest I wasn't using all the memory in it anyway so no problem!
A close up showing the Bigram installed in the A3000 now.
With that done, the next step was getting the USB working, which meant installing Poseidon v4 (from disk) and the latest RapidRoad USB driver (downloaded from
icomp.de Wiki website).
Pleased to say the RapidRoad USB worked straight away, giving me USB on the A3000 at last. This will make data transfer so much easier now.
I tested with a 32GB USB stick and it came up straight away:
I tried to get the X-Surf 100 network card working next, but unfortunately it didn't work. I have the latest driver from
wiki.icomp.de, but when trying to initialise it in the Genesis wizard (AmigaOS 3.9) it locks up the machine completely every time...
I installed the latest AmiSSL4 from
Aminet (downloaded from another machine) while thinking about what to do to fix the X-Surf 100:
Music helps too, so I loaded Digibooster onto my A3000 to give me some thinking music via my extensive Hoffman mod collection!
It didn't work to provide a solution alas.
A timely package then arrived with my new Drinksbench 1.3 mug, which was great as I needed a coffee at that moment! I love this mug - you can buy them on Ebay and they will customise the drawer names and the number of Sugarlumps as well!
I decided to turn my attention to the PicassoIV card, with it's Paloma TV and Concierto addons. I should also mention it has the Pablo IV addon installed too so it is fully kitted out...fantastic!
I got the disks I needed from
amiga.resource.cx (PicassoIV entry), and extracted the ADF's to real floppies on the A3000. Yes, I know I could mount them with GoADF but I wanted to do it old school and some of the images were DMS files so I had to use floppy disk anyway :-)
As covered in Part 1, I hit some trouble with the higher resolution on the Picasso IV, and decided to use the lower screen resolution that worked fine.
This TFT screen support 1280x1024 16/24bit so it should work, but this is what I get when I try to use it (testing with Picasso96Mode):
If I do 1280x1024 in 256 colours (8bit) it displays fine after I adjust the vertical output to 75Hz and non-interlace:
I tried the same trick on 16/24bit modes at 1280x1024:
For a brief time, it looked like I nailed the problem - it worked at 1280x1024 at 24bit colour:
So much real estate and the icons are so small now!
Trouble is that the screen keeps dropping out of sync and turning off the display - constantly. I can power off/power on to temporarily restore the screen, but it keeps happening.
I tried fiddling around with PicassoModeTNG, installed as part of the PicassoIV install disk I extracted earlier. It made things worse:
I tried fiddling with the settings for the affected screenmodes, but it wouldn't allow me to keep the settings I got working for some reason...
Using PicassoMode TNG stuffed up the Piccaso96 config and when I rebooted I had no screen at all. Great....
I gave up on PicassoMode TNG, reinstalled Picasso96 to restore the original PicassoIV driver and settings. I then went back to the older Picasso96mode program again:
I cleaned up the resolutions and modes to inactive that I didn't want to use, and adjusted the lower screenmodes like 320x240, 640x480 to use a higher frequency than the standard 31hz.
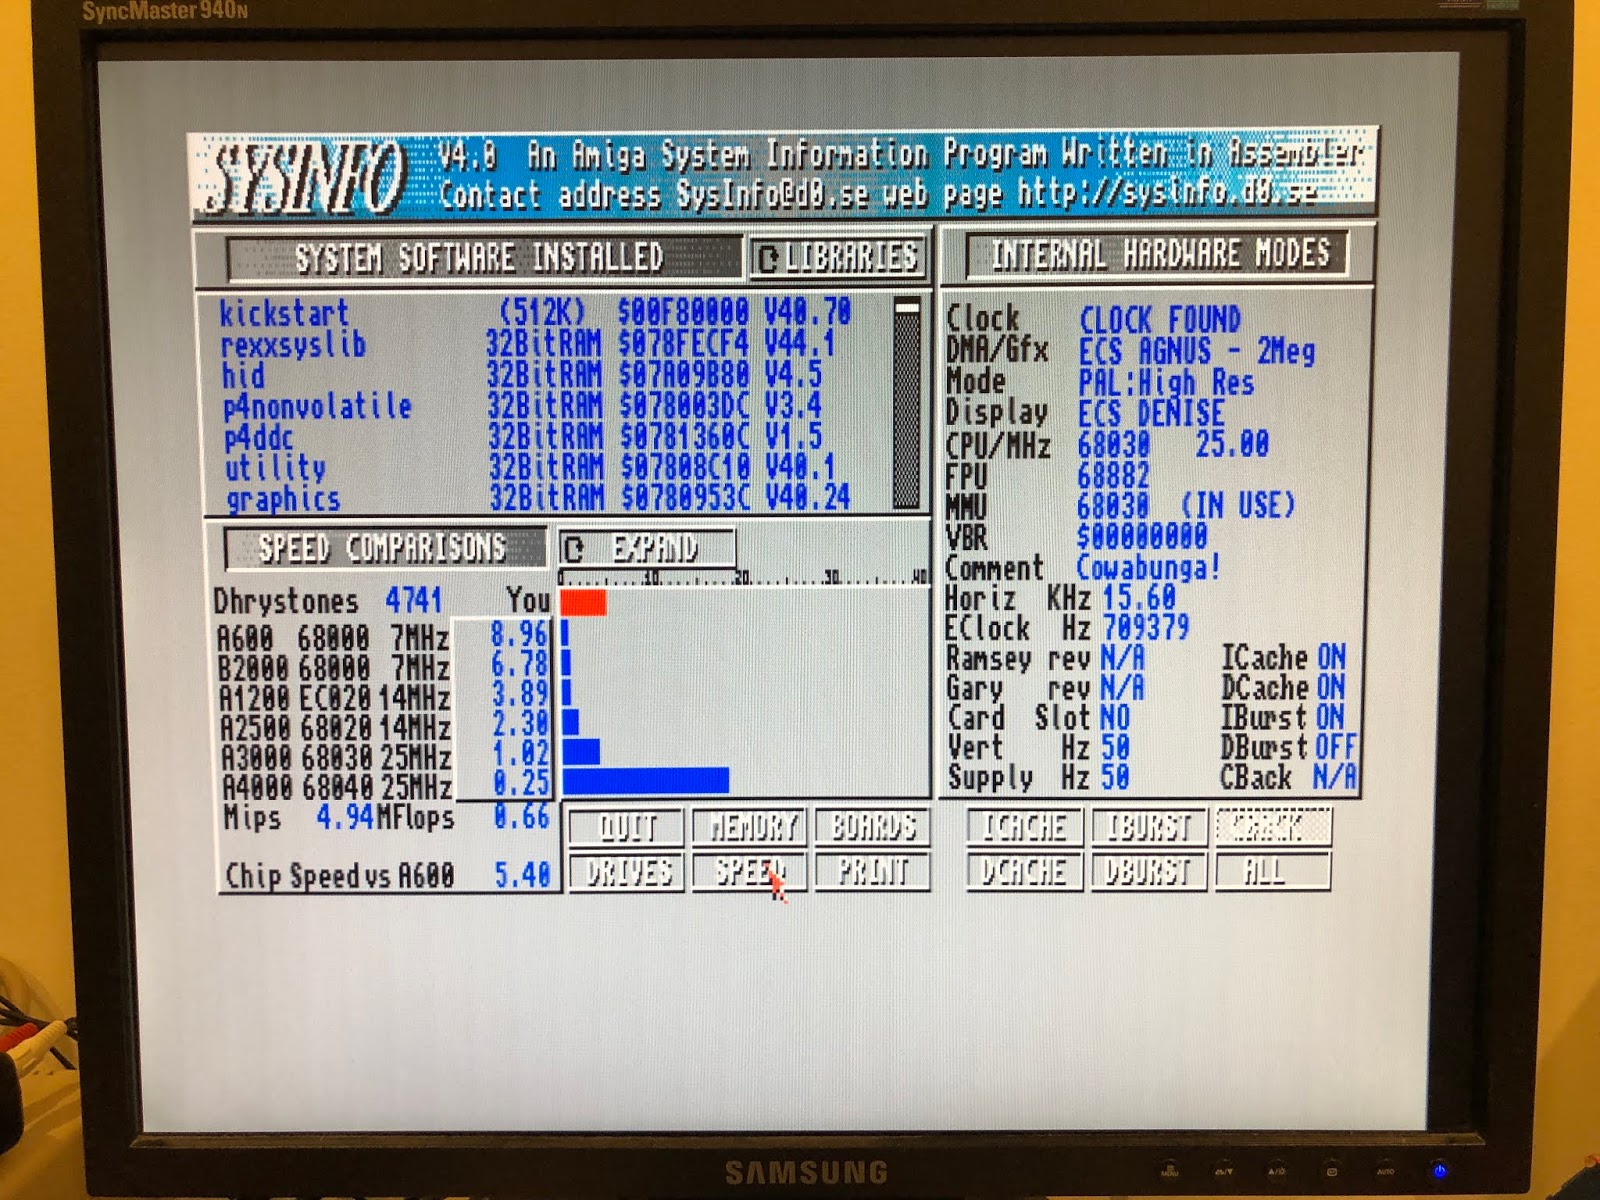
I choose to keep using 640x480 resolution for now. Mainly because of the sync issues I hit with the higher resolutions, but also because the A3000 really slowed down a lot running at 1024x768 and 1280x1024 modes...probably because it is only an 030 accelerator in it?
No doubt I will revisit this later though!
Next up I installed the Concierto sound card addon drivers for PicassoIV from floppy disk:
Concierto needs AHI installed, which I installed as part of AmigaOS 3.9 so I didn't need to install it before proceeding.
After installation I got this very cool Commodity Mixer program for Concierto, which is available on boot. It allows me to output Amiga native audio and Concierto audio via the PicassoIV audio ports, and choose the sound levels, etc.
I will never understand why we never had this kind of built in mixer included in AmigaOS back in the day...I am glad to have it now though.
I ran the AHI prefs to select the Concierto instead of built-in Paula Amiga output for audio output for AHI aware programs:
I also maxed out the channels and frequency. Who wants 7000Hz as a default output?
The Concierto is a 16bit sound card, but it doesn't do anything for MP3 playback in hardware on the A3000. I need another solution for that, which I will add later...
I then installed the Paloma TV driver disk on the A3000.
The Paloma TV installer detected the PicassoIV needed a firmware upgrade. Interesting, I guess the previous owner of this card didn't use it?
You can see from the warning why I wrote out the floppy disks to real floppies rather than just using GoADF to mount them virtually. You need to boot from the install floppy to fix the PicassoIV if the firmware update fails.
With the firmware successfully upgraded, I rebooted and held down the left shift key to access the PicassoIV startup menu.
I learnt about this feature after reading the manual while waiting for the installer to finish. I never read the manual before now (in my defence I never had one) and I really should have! I downloaded it from amiga.resource.cx. Anyway, the early startup menu lets you modify a number of PicassoIV parameters, and options for the addon Concierto and Paloma TV card:
With the Picasso IV options you can change the interlace flicker fixer configuration:
The Concierto options lets you adjust the Amiga audio signal volume and whether to play a small Beep on startup or not:
The Pablo IV configuration let's you choose the TV standard, signal type, flicker filter and screen offset settings:
It was important to check this since I need it to be PAL for use in Australia.
I should mention that even though the Paloma TV card support tv tuner functions, it is only for analog TV tuning. Given Australia switched over to digital tuning only a number of years ago, this makes it effectively useless except for tuning old systems using RF output...On the other hand, the S-Video input can also be used, and this is my plan here for the A3000.
Next I went on a trip to Jaycar electronics again to get some s-video cables and other goodies. I was sent a $25 gift card from Jaycar which was very timely :-)
I want to hook up my Panasonic DVD/HD TV recorder to the A3000 using the Paloma TV card I just setup!
I picked a AV switcher that has s-video ports on it as well, as I wanted to be able to input more than one source to the A3000.
As you can see, the Panasonic has S-Video out on it, which is exactly what I need. I have never used S-video before!
Initially I hooked up the Panasonic to a HDMI display so I could change the settings, as the output is HDMI at present.
Also, because HDMi output is 720p/1080p and the Paloma TV is expecting a 4:3 aspect screen, I also need to change the TV aspect to match:
Last, but not least I need to adjust the AV output settings to use the S-Video rather than the standard AV output ports:
All done, and ready to try out:
I then wired the Panasonic S-Video output to the A3000 Paloma TV S-Video input port, and the audio output from the Panasonic av output to the microphone input. I then ran the Paloma TV program installed earlier from the Paloma TV disk:
Successful, but it is in black and white! I found it was an easy fix, the cable was not quite secured correctly:
The audio was too loud, so I reduced the input volume using the Concierto mixer program shown earlier and it worked perfectly:
The Paloma TV program let's you run in a small window or full screen window as below:
The video is smooth and works well - not as crisp as a HDMI display but that is to be expected:
You can also run it in full screen, which is terrific:
Being letterbox and 4:3 aspect, programs recorded in 720p or DVD's will naturally not fill out the screen. I could opt to change the output from the Panasonic to output Pan and scan to fill out the display and cut off the left and right to fit, but I am happy enough with this:
I played some DVD's through it as well, which worked great - who would have though we could watch DVD's on our Classic Amigas :-)
Love this show, has me in stitches every time.
I next hooked up the Amiga CD32 to the switchbox I setup to connect to the Amiga 3000.
Now I can output the CD32 to the Amiga 3000 via the Paloma TV and play on it! :-)
Very very cool. Loving this Amiga 3000:
I picked up the recently released Pong 4K for Amiga CD32, and this gave me a good excuse to try it out, played through the A3000 :-)
Next I wanted to use my roland SC-88 MIDI device with the A3000. This something Amigas are very good at, and I already have a MIDI expansion module from the A2000 which I decided to use on the A3000D. Here it is connected up:
In case you are wondering, one of my friends made the Amiga floppy disk in a sea of random electronics as a birthday card for me back in 1996 with a message to me on the back. I have cherished it and kept it on display around my Amigas ever since!
I picked out some MIDI songs online to play using the Horny software (available on Aminet) to playback using the Roland SC-88 via the MIDI port expansion module. It is possible to use MIDI through the Concierto too with the CAMD Driver, but it uses mini MIDI converter cables which I don't have.
The output of the MIDI songs is fantastic from the A3000 with the SC-88 Pro. I put up some pictures and videos of the MIDI output and video output from the A3000 on my Instagram feed, but I can't embed them here. I include
my instagram link if you want to check it out.
I used the same setup on my AmigaOne X5000 too before this, except using an Edirol USB MIDI device instead of a Classic Amiga MIDI expansion that uses the serial port.
Let's move on from MIDI now.
It is great to have all these cool features on the Amiga 3000, all the more impressive considering it is using a 030 accelerator to do all this:
Given my issues with the X-Surf 100 are still present, I decided to get internet working temporarily on the Amiga 3000 by using a Plipbox Ethernet device connected to the Parallel port.
I have looked at the Plipbox previously on this blog so I won't spend too much time on it again here.
Here is a look at this particular Plipbox I got a while back, which is encased in a nice A500 expansion style casing - looks very nice:
The device needs power from a power supply or USB power. The options are shown on the bottom of the plipbox casing - very handy:
I installed the plipbox device downloaded from the
lallafa website into Devs:Networks and then setup Genesis under AmigaOS 3.9 on the Amiga 3000 to use it:
It initialised fine. I needed a web browser, and just this week the latest version of iBrowse 2.5 was
finally released for purchase. It is available as a AmigaOS 4 native PowerPC version and Classic Amiga version.
I decided to buy it to support ongoing development, and installed the software in demo mode on my A3000 while waiting for my registration key:
Because I have AmigaOS 3.9 with the internet software option installed, an older 2.4 version of iBrowse is already installed, so the 2.5 installer detected it and offered to upgrade it:
The iBrowse installer asks which CPU I have:
I chose the 020 with FPU option, as 030 is not listed for some reason! Since I have the PicassoIV card I can use the truecolour images with iBrowse, so I selected that option:
Note that this option needs the PNG datatype installed, which I did earlier by installing the WarpPNG datatype, available from Aminet. It also installs a bunch of MUI classes:
Install all done!
I then connected to the internet using the plipbox on the A3000:
First launch of iBrowse 2.5 on my A3000.
Successfully connected to the internet now on the A3000 using iBrowse 2.5, I can finally download software directly to the A3000 instead of USB transfers.
Download speed is ok, not fast of course using a parallel port, but bearable, especially since it is only temporary:
I downloaded sgrab so I can start screenshotting the A3000 workbench rather than having to use the iPhone for everything.
I plan to replace the Buddha flash ide card in the hope that it fixes the issue with the X-Surf 100 - I have a new Elbox FastATA card on order which should hopefully address it!
While I had the case off, I noticed that the issue preventing the power button from lighting up (which has been the case since the beginning) appears to be a loose-ish connection to the front facing board. When I push it in the right way, it lights up again!
It is total luck whether it works when I put the case back on since it moves it, but for a brief moment it worked! If I push up on the front underside of the bottom the A3000 sometimes it flickers to life!
I just wanted to show some proof that it does actually work!
In the next part of the Amiga 3000 build I plan to install the Fast-ATA IDE card, add a new external housed SCSI2HD that is on order, and also try to get AmigaOS 3.1.4 working on it, once I receive the new physical roms so I can register them and get the softkick roms to add the bonus code to. This means building up a new HD as I want to keep this current setup intact before attempting AmigaOS 3.1.4 on it just in case it doesn't work. I don't want to lose all the work done so far.
Still lots to do and can't wait to get into it soon!