This time I decided to build my MorphOS system from scratch with a new install, and get to know MorphOS a bit better by building it up myself with what I actually want, rather than installing the separate Chrysalis Pack ISO that makes lots of changes to MorphOS and installs a lot of software I never use, without me understanding anything much about it.
I think robbing myself of that setup work means I have never really understood MorphOS very well over the years, compared to AmigaOS 4.1. Time to fix that!

I downloaded the MorphOS 3.10 iso from Morphos-team.de and burnt it to CD-R. I then put it into my PowerBook G4 and booted up from CD (holding down the C button on boot):

The OS very quickly boots, and I am soon presented with the MorphOS install screen:

I wanted a clean install, so I did a quick format on the System partition from my MorphOS 3.9 install. This avoided me having to repartition the drive since it was already done, and kept my files on the Work partition which I wanted to keep.

This meant I could choose New Installation and the correct disk comes up ready for the installation to proceed, and eventually copies all the files across to the empty partition..

With the install done, a quick reboot got me back to the MorphOS Ambient desktop, and I copied my registered key file to the correct directory to activate my full version of MorphOS, as below.

With that done, I took a look around at the new 3.10 version of MorphOS.

You can get a nice run down on the new features from this link on Morph Zone if you want more details. It saves me having to cover it again here.
I have to mention that MorphOS boots SO fast on my Powerbook G4 compared to AmigaOS 4.1 on my X1000! I would be interested to see how MorphOS 3.10 works on the X5000 - I don't have one to try it out on though.
Like Workbench 3.1 and AmigaOS 4.1, the title bar at the top can be right clicked on to show a number of menu options:

The MorphOS readme covers the new supported hardware in MorphOS 3.10, amongst other things:


You can see the windows under MorphOS have more toolbar functionality than Workbench 3.1 or AmigaOS 4.1 have by default (you can add most of this by running Directory Opus 5 as covered in earlier blog posts) but I am looking at MorphOS here so I will focus on that here.
The usual familiar Workbench 3.1 drawers likes Prefs, Tools, Utilities, Devs, Classes, WBstartup are visible in the System drive.
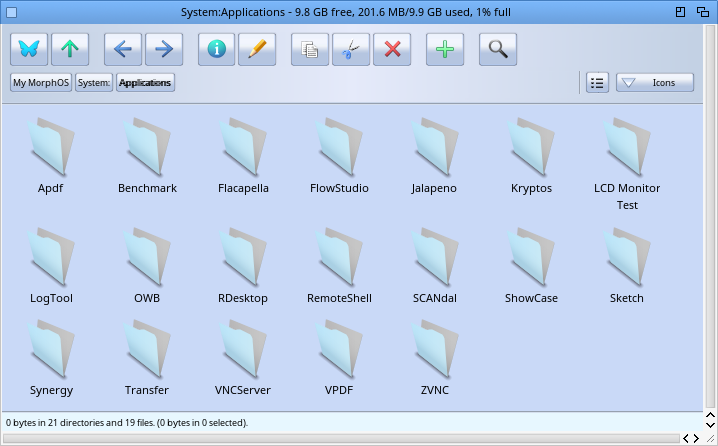
I immediately started playing around with the applications installed in the Applications drawer under MorphOS 3.10
Here I am opening up an PDF in VPDF:

I also fired up Jukebox to play some MP3's and also the MIDI keyboard program.

Next up is trying out the updated OWB v1.24 web browser for MorphOS 3.10:

As usual I ran the Download Fonts to download the true type fonts from the internet before running OWB for the first time.

I browsed a couple of favourite web sites:


These days I note that the newest MorphOS software is uploaded to Aminet rather than the morphos-files website, which I note has not been updated in some years...

Nonetheless I downloaded PowerSDL from here, as it is needed to run many SDL MorphOS games and is not included in MorphOS 3.10.
As you can see Aminet has plenty of recent MorphOS downloads:

I then went into the OWB settings > Downloads section:

I modified the settings here in OWB to change the Download drawer from RAM: to Work:Downloads and set it to Start Downloads automatically.

Another included application is the new Flow Development Studio:


Another application is Task Manager - which is rather useful and seems modelled on the Windows Task Manager:


The MIDI keyboard mentioned earlier is also included:

Audio Recorder for recording audio samples in MorphOS:

There are a few games included as well, such as Diamonds:

Minesweeper:

PixelCross is also included:

If we move on from Games now into the Prefs drawer we see the MUI and Preferences programs:

The MorphOS Preferences program is great, with all the settings in one place. This differs from AmigaOS 3.1 and 4.1 where preference items are individual icons in the Prefs drawer.

You can change the screenblanker settings with a few screensavers available to choose from, and how long to delay the blanker and turn the screen off:

As you can see the settings are very granular!

You can even run scripts on blanker start/stop and monitor sleep events. Very cool.

Here is the Sound settings in Preferences:

IControl is similar concept to what it is under Workbench 3.1, but a lot more options:

You can change the boot picture when MorphOS boots, and even change the text and font that appears at the bottom of the boot screen if you desire to personalise this! Nice.

The network settings are also configurable here, with the inbuilt wireless and fixed cable Ethernet supported straight out of the box and selectable which one is active. You can also search and connect to any WiFi connections here and set it to use it everytime:

Another nice touch is that MorphOS supports the concept of different users! AmigaOS 4.1 and Workbench 3.1 don't support this.

Yet another cool feature is the built in support for network printers and configuration via the NetPrinter Preferences. I plan to try this out later:

The Time settings allow to change the time/date, time zone, and configure MorphOS to use the internet to get the time automatically.

Localisation and language support is also configurable in Preferences:

The Audio preferences is in essence the AHI preferences, and works similar to Workbench 3.1 and AmigaOS 4.1 AHI configurations. Sound is of course supported out of the box.

USB preferences in MorphOS is the latest development of Poseidon USB stack, used under Workbench 3.1 too, to enable USB support.

Given that MorphOS is installed on a Powerbook G4 laptop, it also has Laptop preferences which allow you to configure laptop specific preferences that wouldn't apply to a standard desktop system installation:

Settings like CPU frequency, cooling temperature thresholds, hard disk sleeping, and more.

The Mouse settings are next, and allow you to configure the mouse speed, click delay, and what the mouse pointer/wait pointer looks like:


A separate Printers preferences allows settings for physically attached printers, and I believe is also used as part of setting up network printers, but I haven't tried it yet:

You can also set the cache settings for the drives on the system:

Below is the Monitor preferences, which you can edit as needed. The standard Powerbook G4 screen mode is defined out of the box of course:

Under the Screens preferences, we can edit the Ambient screen settings, covering screen resolution, the graphical skins applied to the Windows on the Ambient desktop, and more.

In my case, I changed the default Window skin to the Origo skin, as I prefer it to the default one included with MorphOS. It feels more like an Amiga to me, but your mileage may vary...

You can download different skins to make MorphOS look more like Workbench 3.1 or AmigaOS 4 if you desire. The screen settings above are actually part of Magic User Interface (MUI) v5, integrated into MorphOS.
MUI v5 on MorphOS is different from recent MUI 5 versions for AmigaOS4 and Workbench 3.1. That is because the original developer of MUI3.x on Classic Amiga, Stefan Stuntz (and authors who followed him), wrote the MUI versions released afterwards exclusively for MorphOS.
The other AmigaOS MUI versions are maintained separately by other people.

Here is the Windows preferences within MUI5 - everything in MUI is very customisable and is beyond the scope of my initial look here - so I just show a small section of that here:

The MUI versions released to Classic Amiga and AmigaOS 4 are only loosely related and the functionality does vary also.
If I now move into the Tools drawer, you can see the programs below:

FileImageCtrl allows you to mount Amiga floppy disk images and CD iso image files under MorphOS. Below I have mounted a disk containing music module files.

The disk icon appears on the MorphOS desktop and I can view the contents just like the real original floppy disk.

As you can imagine, Defrag allows you to Defragment the hard disk drives to optimise the positioning of file data on the disk to speed up read/write times.

Mounter works much the same as it does under Workbench 3.1 and AmigaOS4, to mount drives and partitions.

HDConfig is the MorphOS equivalent of HDToolbox under AmigaOS4.1 and Workbench 3.1.

The Tools drawer also contains an MUI Shell (1st screenshot) and normal Amiga shell (2nd screenshot) as below - you can see more functions available in the MUI Shell:


The Regtool program is what you use to create the registration keyfile data from your system, to send to the MorphOS team. Once you pay the license fee, the completed registration key is sent back to you and once placed in the right folder will remove the 30 minute slowdown restriction in the system when initially installed.

The registration key is tied to the hardware you ran the regtool on, so it is not transferrable to another computer. As mentioned, since I have previously registered my key I put in the right place when the installation completed, so it would work unlocked straight away.
Snoopium is a tool to troubleshoot badly behaving applications under MorphOS, and is there to allow users to help developers with fixing bugs in software.

Unit control allows us to mount or eject media (eg. CD's from the internal drive). We can also do this from the eject icon in the Ambient desktop titlebar.

SFSDoctor is a tool to help scan and fix problems with SmartFileSystem formatted partitions under MorphOS. Generally partitions are formatted with SFS, and there is a similar tool for PFS formatted drives if you have any of those present.


Below is the installation wizard. The installer program under MorphOS looks a bit different to AmigaOS 4.1 or Workbench 3.1, but works pretty much the same way:


Once I finished the installation, I was ready to try an SDL application, so I downloaded Schismtracker (a music tracker based on the rather excellent Impulse Tracker made right here in Adelaide in the 1990's) to try it out:

As regular readers will know, I love my music modules, and it is normally the first thing I want to get working on any new system setup:

I also had a go at AmigaRacer (MorphOS version) while I was in the mood to try out a game!

Runs great under MorphOS 3.10, windowed or full screen:

One last configuration area I would like to touch on in MorphOS 3.10 is the Ambient desktop itself. You can change the settings for this in the titlebar menu as shown below:

Here you can change the desktop background and many other settings as you will see:

The next few areas cover Icons / Miscellaneous settings, Lister, Window and CLI launching parameters:


Of more interest here to me initially, is the Panels section in the Ambient settings as below, initially empty:

This is of interest because this Panels functionality is how we create a Mac-style "Dock" for launching programs in MorphOS. I want to have one, so let's get started with it!
First is creating a new Panel, and renaming it to what I want to call it. MorphOS supports multiple Panels, so the names should be descriptive if you plan to have multiple Panels on your desktop.


You can adjust the behaviour of the Panel as shown above. You can also have sub-panels within the Panel itself. This particular functionality is quite similar to Amidock under AmigaOS 4.1.
Once you save this initial Panel, you will get a small vertical panel with nothing in it, that you can move around by click and drag. Once you have it where you want it, simply drag programs you want to launch via the Panel onto the vertical panel, and the icon will appear there automatically.
I have done this below with the OWB program to start with:

I then started adding other usual programs to it, like the calculator, Preferences, FileImageCtrl, MUI Shell, and so on...

Here is a close up of the Panel I have created.

Note that if you right click on the drag bar on the left side, you can Save the changes you have made to the Panel, Configure the overall Panel settings, and lock the Panel so it can't move.

Clicking on Configure... goes back to the Panels section of the Ambient Settings screen I showed earlier, and you can now see all the programs I have added to the Panel I created!

For the final thing to try in this part of my MorphOS 3.10 build, I wanted to try out the new Iris email client for MorphOS, released around the same time as MorphOS 3.10. This email client supposed HTML emails, which is very exciting.

Once I downloaded the program (available here) and extracted it to a drawer on my MorphOS 3.10 system, I ran it and was presented with the initial email account add screen:

I added a test gmail account. Gmail accounts are generally an annoying thing to get working on Amiga email clients in my experience with multiple fiddly settings needed to be set, but to my surprise Iris worked out the settings needed by itself!

Iris then launched OWB for me to log into Gmail to allow access for Iris to my test gmail account! Neat!

Having allowed access to IRIS I could then close the OWB window as prompted below.

With this done, Iris then lets me know everything is configured and ready to use:

With that the main Iris email client screen opens up and displays the Gmail account mailbox I configured as above. I love how easy this was! I also clicked on an HTML email to confirm it does indeed display HTML emails - very exciting.

I then sent a test email using Iris. There is no toolbar in the Iris client, and so you need to use the title bar menu to select to compose an new message. Hopefully they add a toolbar to the program soon, as this is functionality I prefer to have in an email program.
For my test email I included inline PNG photos and different fonts, colours and styles to test out the html email functionality. Pleased to say it worked well. Unfortunately the screengrab software on MorphOS didn't show the contents of my email I composed for some reason!

I can show what it looked like on my iPhone X when I received the email so you can see what I actually wrote in the email, as below.

Iris is very promising email client, and I will follow it's ongoing development on MorphOS with great interest.
Hopefully this gets you interested to try out MorphOS 3.10 if you haven't already.
I still have a lot more work to do on this build of the new MorphOS 3.10, and will create the next part of this build series as soon as I can!