The amazing thing here is that this is the first upgrade for Classic AmigaOS since v3.9 Boing Ball 2 back in 2001!
The new Hyperion Entertainment v3.1.4 2018 release is in fact an upgrade to the Commodore released Workbench 3.1 released back in 1993, rather than the AmigaOS v3.5 and v3.9 versions released in 1999 and 2000 by another company called Haage & Partner.
I bought my v3.1.4 release from Alinea Computer.
This 3.1.4 release also includes an updated 3.1.4 kickstart rom, which needs to be physically installed in the Amiga 500.
You can register your kickstart rom registration number on Hyperion Entertainment's website to get access to the rom file (for soft kicking on your Amigas if you don't want to use a physical kickstart rom). You can also get the adf files of the Workbench v3.1.4 disk set to load up on the gotek, and some new icons created for the 3.1.4 release too!
Update 16/12:18: Some requirements to be aware of is that this release requires more than 512k memory to work. So this rules out base model Amigas that have no expanded memory installed. It does apparently work fine on 68000 CPU systems. Hyperion Entertainment says in their FAQ document with the download package (from their website) that the actual memory usage requirements are:
0.6 MB just to boot + 0.5 MB for loading ROM modules + 0.9 MB for free
memory. So really, it is 2MB required. Keep this in mind.
Instructions are included on how to install the kickstart rom in each Classic Amiga model supported by this release. Note that this won't be installable on CD32 or CDTV, probably due to the differences in the roms to support auto booting CD's, Audio CD playback menus, etc. (unless you are happy to lose those features!)
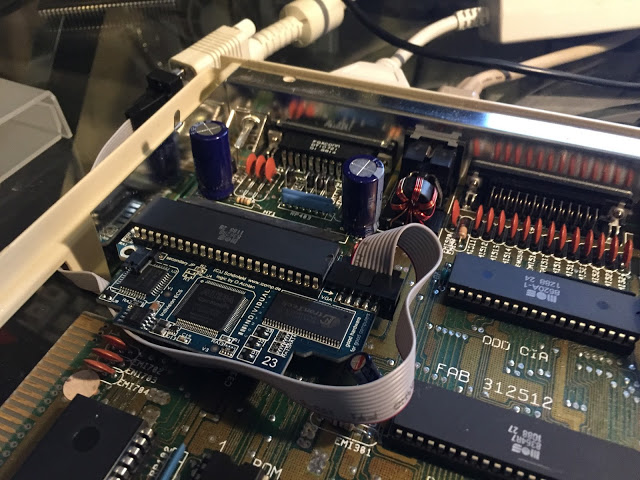
Here you can see the original 1.3 kickstart rom installed - next to the 2MB chip ram upgrade Ace2 I installed recently:
After my problems with my chip extractor last time, I went out and bought a brand new one which I am pleased to say works much better! The kickstart rom chip came out perfectly first time:
Here is the new 3.1.4 kickstart rom in place:
It feels pretty good to have a kickstart rom upgrade for the first time since 1993!
Next I powered on the A500 without any attached devices except the floppy drive. Success!
Close up of the new Kickstart insert disk screen, showing the new 3.1.4 kickstart version 46.143, and a boing ball in place of the old checkmark, similar to the kickstarts on NG AmigaOS4.1 FE.
I then attached my ACA500 back onto the A500. Here is where I needed to do some configuration work before I could go much further.
The ACA500 CF card boots Workbench 3.1, which will not work properly with the new rom until I install the new Workbench 3.1.4 onto the CF card.
I also need to avoid using the soft kick 3.1 rom option in the ACA500, as I want it to use the onboard 3.1.4 kickstart rom instead. So I needed to configure a custom profile, which I did as Profile #02. I set the options as below:
Having set the configuration as I needed to, I then saved the configuration as Profile 02:
I next powered off, and set the DF0 selector to use the external floppy drive instead of the gotek. I could then boot the Workbench 3.1.4 Install disk to get the installation to the CF card underway:
So this is the first boot of Workbench 3.1.4 on my Amiga 500, using the Install disk:
The Workbench and Work partitions are on the Amiga CF card in the ACA500, and the PC0 is the PC FAT32 formatted CF card in the other slot on the ACA500.
The gotek is using a A1000 kickstart disk adf so that it can't boot (in case you were wondering).
I then started the Workbench 3.1.4 installation, which works identically to the old Workbench 3.1 installations:
Ready to start the installation proper:
The Workbench 3.1.4 installation then detects my existing Workbench 3.1 installation and offers to upgrade it:
Of course I want to proceed with this! Next it backs up some of the old files no longer needed to the Workbench:OLD drawer:
The next step says it will delete some "old files no longer needed", without specifying what they are! You can manually step through this bit to make sure you are not deleting anything important. I decided to throw caution to the wind on this occasion and proceeded to let it delete what it thought it needed to:
The installation then proceeded as per a normal Workbench install, prompting for the various disks as usual:
It is somewhat nostalgic and kinda cool to be installing a new Amiga operating system from floppy disk in 2018! Here the floppies are all laid out ready for me to swap in as requested:
The installation warns me that it has detected an 030/040/060 CPU (from the A1200 accelerator attached to the ACA500) and I should ensure the appropriate libraries are installed for it before rebooting.
For an 030 accelerator there is no specific libraries I am aware of. This warning normally applies to 040 and 060 accelerator cards. So I didn't do anything further and proceeded anyway.
Update 16/12/18: I have been informed on Facebook by Robert (cheers mate) that actually there *IS* a 68030 specific bug fixing library called mulib available on aminet here that should be installed as part of the installation. Apparently this addresses a bug in the EC030 without an MMU installed, which applies to me since I have a A1200 accelerator with an EC030 installed. You learn something every day!
I have downloaded it and transferred by PC formatted CF card to the Amiga 500. I then extracted and installed the update and now the warning message on boot regarding this point (as below) goes away.
The Mulibs install takes a while and needs a reboot once completed - I installed as a novice user and it installed everything without further prompting from me.
Anyway, back to the original installation now!
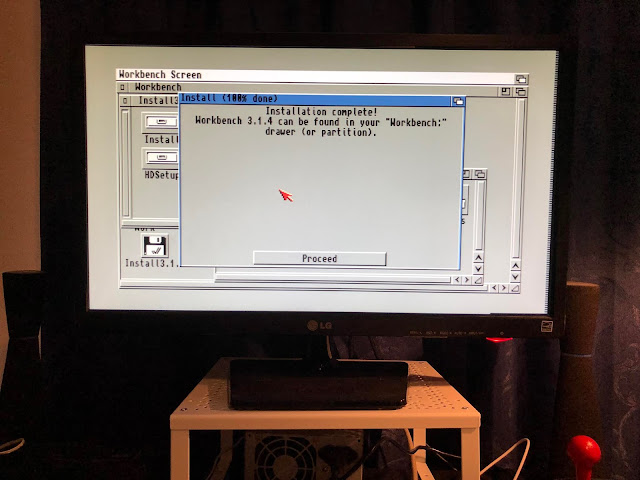
The installation is now finished:
I then rebooted from the CF card in the ACA500 and very soon my new upgraded Workbench 3.1.4 appears.
I see it has maintained my MagicWB colours and icon settings, and as expected it has blown away my Dopus 5 workbench replacement installation.
I get rid of the backdrop first of all to uncluttered the workbench, never did understand why that was included in Workbench!
That done I took a look around the drawer structure and everything appears as I would expect. Workbench 3.1.4 changes are mostly under the hood.
I plan to do a deep dive on the new features and updates in v3.1.4 in 2019 but for now I am glad that it is up and running on my Amiga 500.
Update 18/12/18: I downloaded the optional icon pack and bonus wallpapers from Hyperion's website after registering my kickstart rom serial number. Because the A500 is limited to 16 colours on the workbench, the new icons don't look that great (they do look ok in 16 colours though) as I think they are really intended for a RTG or AGA screen with 256 colours+. I will use them on the A2000 and other Amigas later on.
I'll leave the MagicWB icons for the A500 for now as they look great with a small number of colours available for the workbench.
I hope you have enjoyed my blog this year, and I look forward to do more blogging in 2019.
Please note that I will be going on holiday soon and moving house in the new year, so all my Amigas will be packed up and will not be accessible for some time from now. This is why this blog entry is a lot shorter than I originally planned, as I wanted to get it out before I packed up.
I expect to resume blogging as soon as I am set up again with my Amigas in my new place. I am not sure exactly when that will be but I will try to get it done asap.
In the meantime, I wish you all a Merry Xmas and Happy New Year, hope you continue enjoying your Amigas (Classic or NG) and see you again in 2019!


