Today I wanted to take a look at the Microbee CGA to VGA upscaler, which is able to be used on the Amiga to scan double and de-interlace the Amiga native RGB output to a modern TFT screen.
I must first apologise for the lateness in blog posts. I have been very busy with my new job, which I started recently. I have also been distracted by other projects and training I am working on that are not Amiga related to keep learning new IT skills.
However, last week I received notification from Facebook that Microbee finally had stock of their upscaler devices, (HDMI or VGA output) which are compatible with Amiga's too.
Normally these units sell out VERY quickly and I have missed out multiple times in the past, so I quickly jumped on their website to grab a VGA version (AUD$129), and the optional Amiga RGB to CGA cable (AUD$22).
It arrived in the post the other day, and after the usual heavy cleaning due to COVID-19, I could use it.
I bought this device for use on my Amiga 1000. It is the only Amiga I own without a scan doubler installed. The indivision ECS doesn't fit in the A1000 due to the daughterboard on top.
Until now I have been using a 15khz compatible TFT screen with the Amiga 1000, connected to a AmiVGA connector to the RGB port.
Problem with this is mainly that interlace modes don't look good, and the fixed resolution on a 16:9 screen looks a bit funny, with some screen artefacts (lines) that make it less than optimal.
Enter the Microbee upscaler. Microbee is an interesting company, having made the local Australian built Microbee computers in the 1980's which were used in schools and homes too. I used one myself in computer classes in the 1980's in Perth.
I remember learning LOGO on the Microbee computers. I also remember that they were networked to a master "server", which would routinely crash when too many people were using the Microbee computers simultaneously...usually just before you finished typing a long amount of code to run.
I never owned a Microbee myself sadly. The company these days makes this Upscaler to enable the Microbee computer to be displayed on a TFT screen (CGA to VGA). To make it appeal to a broader market they made an Amiga RGB to CGA cable and tweaked the settings to make it work with the Amiga (and other systems like Commodore 128, etc).
Close up of the Amiga cable - it uses a real DB23 connector, not a shaved 25 pin one, which is great:
Pin outs for the RGB to CGA cable were included. Fortunately they build the cable for you nowadays rather than having to make it yourself (which you used to have to do).
On the front of the unit is the Analog/Digital switch and the CGA input port.
On the back is the VGA port and power input (power adapter is included) to power the unit.
I set to work connecting up the cables to the Amiga 1000.
The Amiga cable is very short, so the upscaler unit needs to be close the Amiga 1000 RGB port.
With it all hooked up, time to test it. On power on, I get the ACA500 boot screen (as I have an ACA500 attached to the Zorro port on the A1000). You can see some blue display garbage at the bottom of the screen, but otherwise looks nice:
I adjusted the screen settings on my Viewsonic TFT 19" screen to move the display down a bit to remove the blue bit from view and have a nice clear scan doubled Amiga display:
I booted up my Amiga Workbench 1.3 from CF hard disk:
The Standard Amiga lores screen works great, although I should mention that there is still some screen artifacting on closer inspection in demos and games. I used a demo "Interference" from Sanity to show this - the purple edging has some artifacting:
So, well, it is not perfect. But it is not too bad. Compared to some of my other very old scan doublers, this looks much better! Especially when using the Workbench and applications.
The artifacting is much less noticeable on black backgrounds:
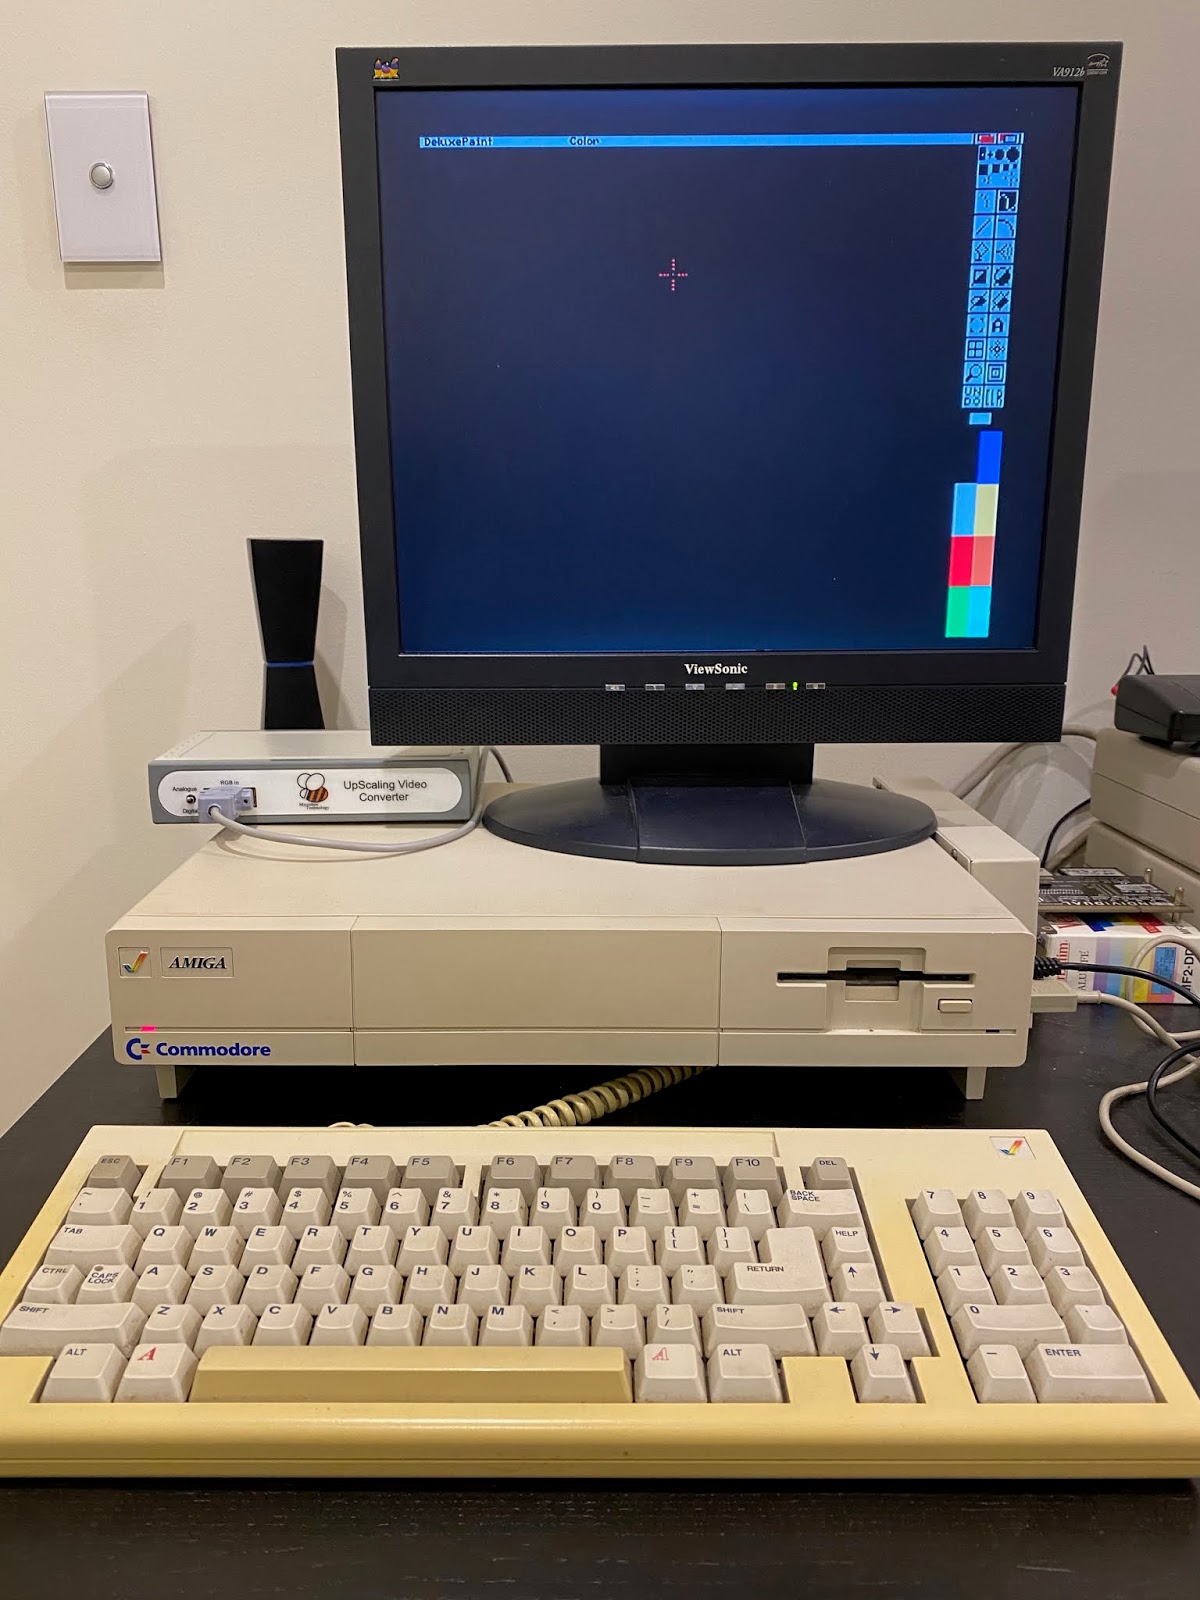
Next I fired up Deluxe Paint IV to test Hi-Res and Interlace modes - Hi-Res first:
The output is crisp and looks quite nice actually:
I tested interlace next and it displays very nicely with no flicker visible:
When using the normal workbench 1.3 with mouse pointer, I noticed some strange "watery artifacts around the mouse when moving. Not really annoying, but noticeable.
I am not sure if there is much you can do to optimise this (I assume the serial cable allows connection to the board inside to customise it), but it is ok for normal use and I haven't played with the board setup at all. Strictly tested as it was delivered to me.
I fired up some more demos that I know use some weird screen tricks (like Wild Copper) and it works well:
I also tested a game - APB - and with this game you can really see the artifacting up close with a purple backdrop. This is a shame as it kinda ruins things a bit:
In short, the Microbee upscaler is good, but not perfect for the Amiga 1000. When I have some more time I will try to use it on some other Amigas as well to confirm if the issues I saw are Amiga 1000 specific or not. For now I will keep using it on the A1000 as it looks nicer than using a 16:9 screen and interlace works well.
Showing posts with label Amiga 1000. Show all posts
Saturday, 11 July 2020
Sunday, 17 April 2016
Indivision ECS on Amiga 1000
One of my planned projects for some time has been to add an Indivision ECS to the Amiga 1000. However this goal has continued to elude me for one reason or another, but I decided to give it another go this weekend.
Because I don't have any old 1084, 1940 or 1960 monitors anymore, all my Classic Amiga equipment needs scan doublers installed to be able to run with my TFT screens. From when I bought the Amiga 1000 in 2015, I have had to use an old Amiga 1200 external scan doubler which doesn't work very well (it does work though) with it.
Since owning this Amiga 1000 I have added a gotek, memory expansions, and this year even tried running an ACA500 on it!
Today though, is the Indivision ECS.
Looking at the back I am not sure how I can mount the VGA port on the A1000 case without drilling a hole in it - any suggestions?
Pulling the case off the A1000 reveals the signatures on the inside of the case, including the recently departed Dave Needle, Rest in Peace mate and thanks for this wonderful computer.
Turning my attention to the inside of the Amiga 1000 now, I needed to buy a special converter for the Amiga 1000 to allow it to use the Indivision ECS on the Amiga 1000.
As you can see it has a socket for the Paula chip, and a socket for the Indivision ECS to be mounted on so that it fits on the A1000. The positioning of the Paula chip to the daughterboard shows why this is necessary.
The converter came with this really helpful german language explanation - thanks, very useful.
Important is to take note the end of the chip with the half circle cut out as it shows which way it needs to be installed to line up with the same half circle cut out on the socket itself.
Here it is removed with a chip extractor.
Yeah, I bent one of the pins..but I fixed it easily. The pins on this chip are really soft.
Here is the Paula chip next to the converter:
I then turned the Paula chip around so that the half circle end lined up with the half circle on the Paula socket on the converter as per the instructions.
Here it is installed on the converter:
Next up is installing the Indivision ECS on the converter. As per the instructions I ensured that the half circle end of the indivision ECS pins lined up with the half circle end on the socket of the converter.
Here it is installed. I left the foam protecting the pins on the Amiga 1000 converter while doing this.
I then realised it is not possible to install this into the Paula socket on the Amiga 1000 unless you remove the daughterboard first...
So a few minutes later and the daughterboard is removed:
Now this is where I got stuck!
The indivision ecs doesn't fit!
Not by much mind you, but it doesn't fit. The pins needed for the daughterboard are covered by the edge of the indivision card:
This shot shows the problem better, you can see how the pins need to be bent out in order for the amiga 1000 converter with Indivision ECS card installed to fit:
If the daughterboard pins are bent out then the daughterboard can't plug in, so the whole thing doesn't work.
Sigh.
I was thinking to myself, why can't I just reverse the direction of the whole converter thing, and rotate all the chips so they are the opposite to normal? That would work right?
After my experiences with the X1000 though I was not willing to chance my A1000 to find this out. But please let me know - this sounds reasonable as a solution right?
I then thought I could try installing the indivision without the converter, It seemed to me that it would fit without the converter, and just put the Paula chip in the socket on the Indivision itself.
I tried that, and it fitted on the Amiga 1000 without a problem.
Unfortunately though, the indivision didn't do anything when powered on for testing. I believe it should be the denise chip in that socket anyway so it makes sense that it didn't work.
So for now I put everything back together minus the indivision and converter, and made sure it still worked, which is does. I even tested the Rys Mark II usb mouse adapter on the Amiga 1000 while I was doing that, and it works perfectly.
I will revisit this again soon if someone out there can tell me how I can get the converter card installed in the Amiga 1000 without bending pins...
Since owning this Amiga 1000 I have added a gotek, memory expansions, and this year even tried running an ACA500 on it!
Today though, is the Indivision ECS.
Looking at the back I am not sure how I can mount the VGA port on the A1000 case without drilling a hole in it - any suggestions?
Pulling the case off the A1000 reveals the signatures on the inside of the case, including the recently departed Dave Needle, Rest in Peace mate and thanks for this wonderful computer.
Turning my attention to the inside of the Amiga 1000 now, I needed to buy a special converter for the Amiga 1000 to allow it to use the Indivision ECS on the Amiga 1000.
As you can see it has a socket for the Paula chip, and a socket for the Indivision ECS to be mounted on so that it fits on the A1000. The positioning of the Paula chip to the daughterboard shows why this is necessary.
The converter came with this really helpful german language explanation - thanks, very useful.
For those unable to read or speak German like myself, this is no help at all.
Fortunately Amigakit includes a guide on how to install it on the Amiga 1000 here.
I set to work, removing the Paula chip from the Amiga 1000 board, which is the chip marked 8634. Will never understand why they didn't label it Paula...anyway, it is the third chip shown in the shot below, on the right side closest to the daughterboard.
Important is to take note the end of the chip with the half circle cut out as it shows which way it needs to be installed to line up with the same half circle cut out on the socket itself.
Here it is removed with a chip extractor.
Yeah, I bent one of the pins..but I fixed it easily. The pins on this chip are really soft.
Here is the Paula chip next to the converter:
I then turned the Paula chip around so that the half circle end lined up with the half circle on the Paula socket on the converter as per the instructions.
Here it is installed on the converter:
Next up is installing the Indivision ECS on the converter. As per the instructions I ensured that the half circle end of the indivision ECS pins lined up with the half circle end on the socket of the converter.
Here it is installed. I left the foam protecting the pins on the Amiga 1000 converter while doing this.
I then realised it is not possible to install this into the Paula socket on the Amiga 1000 unless you remove the daughterboard first...
So a few minutes later and the daughterboard is removed:
Now this is where I got stuck!
The indivision ecs doesn't fit!
Not by much mind you, but it doesn't fit. The pins needed for the daughterboard are covered by the edge of the indivision card:
This shot shows the problem better, you can see how the pins need to be bent out in order for the amiga 1000 converter with Indivision ECS card installed to fit:
If the daughterboard pins are bent out then the daughterboard can't plug in, so the whole thing doesn't work.
Sigh.
I was thinking to myself, why can't I just reverse the direction of the whole converter thing, and rotate all the chips so they are the opposite to normal? That would work right?
After my experiences with the X1000 though I was not willing to chance my A1000 to find this out. But please let me know - this sounds reasonable as a solution right?
I then thought I could try installing the indivision without the converter, It seemed to me that it would fit without the converter, and just put the Paula chip in the socket on the Indivision itself.
I tried that, and it fitted on the Amiga 1000 without a problem.
Unfortunately though, the indivision didn't do anything when powered on for testing. I believe it should be the denise chip in that socket anyway so it makes sense that it didn't work.
So for now I put everything back together minus the indivision and converter, and made sure it still worked, which is does. I even tested the Rys Mark II usb mouse adapter on the Amiga 1000 while I was doing that, and it works perfectly.
I will revisit this again soon if someone out there can tell me how I can get the converter card installed in the Amiga 1000 without bending pins...
Subscribe to:
Posts (Atom)