Showing posts with label scan doubler. Show all posts

Sunday, 10 December 2017

Acer LCD screen that supports Amiga native 15khz modes

Today I wanted to show an interesting LCD screen from Acer that is a current model, available brand new in 2017.


What is so special about it you ask?

Well, it supports Amiga video modes that run at 15khz! So with a RGB to VGA converter you can get native Amiga display on a modern LCD screen, without the need for a scan doubler! Exciting right?

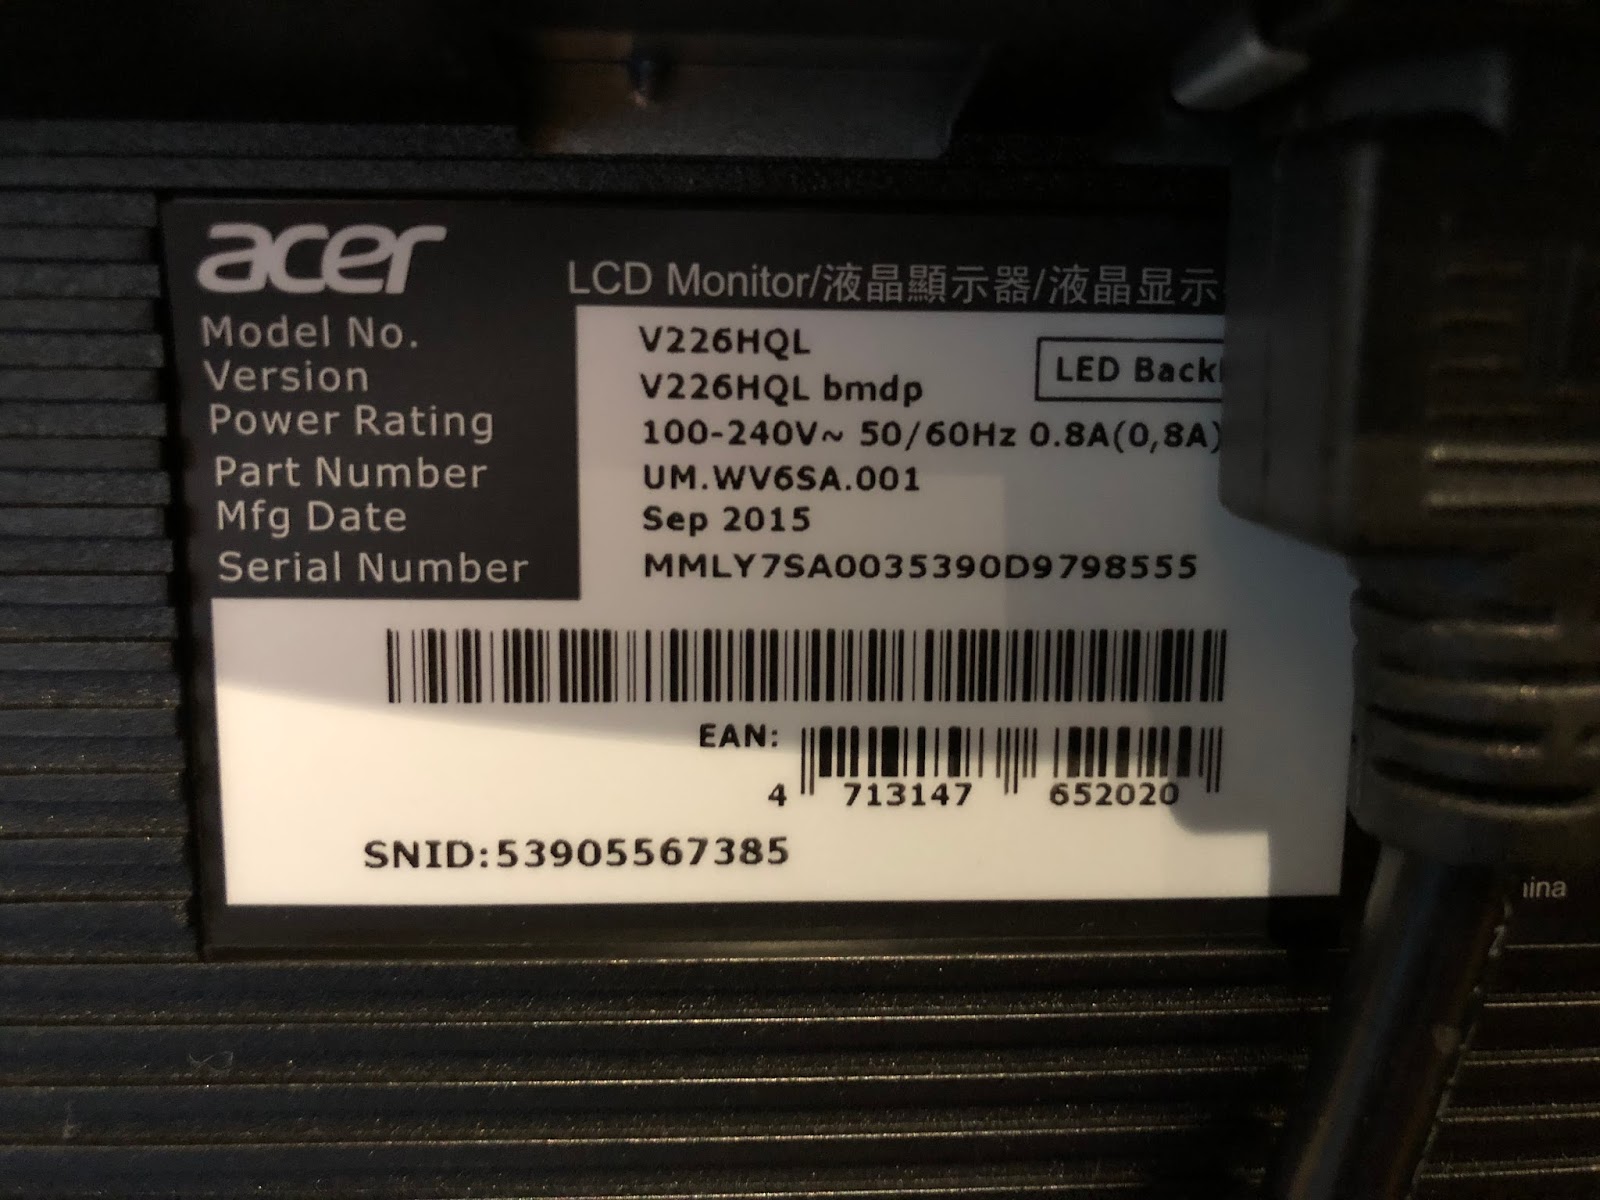
The model I got is a V226HQL model, with the exact information taken from the screen for your reference if you want to get one yourself. Even though I bought this new in it's original box, it is a few years old. I have seen others on Facebook using ones made in early 2017 that work also:


Of course, the Amiga uses a non-standard 23 pin RGB connector, intended for connection to Commodore CRT 1084(S) / 1940 or 1960 monitors. These take up a lot of room and the non-flat displays are very small in this day and age.

To connect the Acer screen to the Amiga, I needed a RGB to VGA converter. This is not a scandoubler - it just converts the existing 15khz signal from RGB to VGA.

These are easy enough to come by on Ebay, but check carefully to get ones that have a REAL 23pin connector, rather than a DIY hacked 25 pin connector on them. Generally sellers try to hide the fact they hack the connectors to make them fit a standard Amiga RGB connection since 23pin connectors are not exactly easy to come by these days. Check the photos carefully and read the seller feedback.

I found a seller on Ebay who makes these converters (from Canada actually), using the right 23 pin RGB connector. I ordered 3 of them!

Here is the converter I received last week:


As you can see it looks well made and the connectors are perfect - here is the RGB connector side:


And here is the VGA connector side:


Since I happened to have the Amiga 1200 out at the time, I decided to try it on that system first. Technically I don't need it since I have an Indivision AGA installed in it already, but hey, why not check it anyway! Here it is connected to the A1200:


On power on I held down both mouse buttons to get the early boot screen, which appeared on the Acer screen straight away! I then brought up the screen mode info screen to confirm it is indeed running at 15khz!!


The screen does promote the screen to this slightly odd 1440x288 screen mode, but it looks fine and the aspect seems ok too. I tried modifying the usual fill screen/aspect control to adjust it to 4:3, but it doesn't change the screen. So the resolution is what it is, but as I said, it displays fine from what I could see.


I moved the screen to a better place since it seemed to be working fine:


I then decided to try a different Amiga. I hooked up the Amiga 600 next. As with the A1200, I already have a Indivision ECS installed in the A600, so technically it doesn't need this screen either.

You can see it installed here, with the MAS player hardware (for MP3 playback) also installed in the back of the A600:


As you can see, the output from the RGB port at 15khz to the Acer screen works fine on the A600 also:


Something to remember though is that because it is native 15khz output that is not scan doubled or flicker fixed, any interlace modes will flicker the screen, the same as all Amigas do on the 1084S monitor or tv output.

Running Bomb's E255 demo on the A600 looked great on the Acer screen:


Next up I hooked up the Amiga 1000, one of the systems I wanted to get this screen for. Unlike the other Amigas I don't have a Indivision ECS installed or a scandoubler connected to it. It needs this screen, and so I was very excited to try it out. As you can see the Kickstart screen came up fine on the Acer:


I did hit some trouble here with the Amiga 1000 though. For some reason when I booted any kickstart disk, the system wouldn't display the Insert Workbench disk screen and instead hung on a black screen. The screen was displaying something, but the system wasn't responsive.

As a test I removed the converter from the RGB port so there was no display. I then booted from the kickstart disk and the machine was clicking the drives so I knew it was at the Workbench boot screen. I connected the RGB to VGA converter at this point and the display appeared and worked perfectly!


Strange behaviour though. It only seems to happen on the Amiga 1000. I tried 1.0, 1.1, 1.2 and 1.3 kickstarts and also all three converters I bought and they all do the same thing. Having plugged in the RGB to VGA converter after the Insert Workbench disk screen appeared, it did work perfectly on the A1000 though - here is Digital Innovation demo running nicely through the Acer on the A1000 at 16khz? Strange huh?


I guess the 16khz is what causes the problems but really don't understand that one. If anyone knows what is happening here please let me know.


Maybe it is just my Amiga 1000 - dunno.


Last, but not least, I connected my CDTV to the Acer screen. It also doesn't have a Indivision ECS scandoubler installed, and until now I use the AV out to connect it to a TV, or my HDMI upscaler to convert the signal to display on my HDMI LCD screens. Now though, I can connect the CDTV directly from the RGB port to this new Acer screen since it can accept the 15khz output. As expected, once powered on it worked great:


I fired up the rather excellent Rink A Pink demo, booting via floppy and it worked great on the Acer too:


Close up photo shows the output is 15khz:


Since I can use it great on the CDTV, I decided to leave it setup for now and played some tunes from the Immortal 4 CD while preparing this blog post.


There is a useful wiki that lists all the 15khz compatible models that people have tried out, which includes the one I covered here today. You can read it here.

It is great that we have options in 2017 to output our ~30 year old Amiga systems to modern screens, still supporting the 15khz output required! If I had more room I would buy more screens now that I know they work, but things are tight in here these days space wise. I might get one more though as a backup...


Sunday, 17 April 2016

Indivision ECS on Amiga 1000

One of my planned projects for some time has been to add an Indivision ECS to the Amiga 1000. However this goal has continued to elude me for one reason or another, but I decided to give it another go this weekend.


Because I don't have any old 1084, 1940 or 1960 monitors anymore, all my Classic Amiga equipment needs scan doublers installed to be able to run with my TFT screens. From when I bought the Amiga 1000 in 2015, I have had to use an old Amiga 1200 external scan doubler which doesn't work very well (it does work though) with it.


Since owning this Amiga 1000 I have added a gotek, memory expansions, and this year even tried running an ACA500 on it!

Today though, is the Indivision ECS.

Looking at the back I am not sure how I can mount the VGA port on the A1000 case without drilling a hole in it - any suggestions?


Pulling the case off the A1000 reveals the signatures on the inside of the case, including the recently departed Dave Needle, Rest in Peace mate and thanks for this wonderful computer.


Turning my attention to the inside of the Amiga 1000 now, I needed to buy a special converter for the Amiga 1000 to allow it to use the Indivision ECS on the Amiga 1000.


As you can see it has a socket for the Paula chip, and a socket for the Indivision ECS to be mounted on so that it fits on the A1000. The positioning of the Paula chip to the daughterboard shows why this is necessary.

The converter came with this really helpful german language explanation - thanks, very useful.


For those unable to read or speak German like myself, this is no help at all.

Fortunately Amigakit includes a guide on how to install it on the Amiga 1000 here.


I set to work, removing the Paula chip from the Amiga 1000 board, which is the chip marked 8634. Will never understand why they didn't label it Paula...anyway, it is the third chip shown in the shot below, on the right side closest to the daughterboard.


Important is to take note the end of the chip with the half circle cut out as it shows which way it needs to be installed to line up with the same half circle cut out on the socket itself.

Here it is removed with a chip extractor.


Yeah, I bent one of the pins..but I fixed it easily. The pins on this chip are really soft.


Here is the Paula chip next to the converter:


I then turned the Paula chip around so that the half circle end lined up with the half circle on the Paula socket on the converter as per the instructions.


Here it is installed on the converter:


Next up is installing the Indivision ECS on the converter. As per the instructions I ensured that the half circle end of the indivision ECS pins lined up with the half circle end on the socket of the converter.


Here it is installed. I left the foam protecting the pins on the Amiga 1000 converter while doing this.


I then realised it is not possible to install this into the Paula socket on the Amiga 1000 unless you remove the daughterboard first...


So a few minutes later and the daughterboard is removed:


Now this is where I got stuck!

The indivision ecs doesn't fit!


Not by much mind you, but it doesn't fit. The pins needed for the daughterboard are covered by the edge of the indivision card:


This shot shows the problem better, you can see how the pins need to be bent out in order for the amiga 1000 converter with Indivision ECS card installed to fit:


If the daughterboard pins are bent out then the daughterboard can't plug in, so the whole thing doesn't work.

Sigh.

I was thinking to myself, why can't I just reverse the direction of the whole converter thing, and rotate all the chips so they are the opposite to normal? That would work right?

After my experiences with the X1000 though I was not willing to chance my A1000 to find this out. But please let me know - this sounds reasonable as a solution right?

I then thought I could try installing the indivision without the converter, It seemed to me that it would fit without the converter, and just put the Paula chip in the socket on the Indivision itself.


I tried that, and it fitted on the Amiga 1000 without a problem.


Unfortunately though, the indivision didn't do anything when powered on for testing. I believe it should be the denise chip in that socket anyway so it makes sense that it didn't work.


So for now I put everything back together minus the indivision and converter, and made sure it still worked, which is does. I even tested the Rys Mark II usb mouse adapter on the Amiga 1000 while I was doing that, and it works perfectly.


I will revisit this again soon if someone out there can tell me how I can get the converter card installed in the Amiga 1000 without bending pins...

Tuesday, 29 April 2014

My Amiga 600 has arrived!

Finally my Amiga 600 arrived today in the post, along with the spare keyboard I bought for it! I was very keen to muck around with it!


This Amiga 600 is almost completely standard, with no extra memory cards, upgrades or hard disks installed.

Below is the view of the left hand side of the Amiga 600, showing the PCMCIA slot.


On the right hand side you can see the Floppy drive, mouse and joystick ports, and the light indicators for power, floppy and hard disk activity.


Moving to the back, you can see the Disk Drive, Serial, Parallel, RCA Audio, Video, AV, RF and Power ports.


The Amiga 600 was the first Amiga to have an AV out port built in. The RF out port was for older TV's lacking an AV port. In this day and age of course we have HDMI and AV ports, with RF still there too!


Turning the Amiga 600 over, we can see the expansion bay cover on the left and vents for letting heat out of the case.


You can open the expansion bay using a flathead screwdriver or a suitable coin, revealing the expansion port (as shown below) which can only be used for Amiga 600 specific expansion cards.

If you look closely you can see the serial number and the "Made in Hong Kong" on the silver label.


As I mentioned before, the keyboard that came with the Amiga 600 is very yellowed. I bought another one separately. This keyboard (unlike the one that came with the Amiga 600) is a UK keyboard, rather than the US Keyboard. This keyboard is free from yellowing, although it will need a clean, the same as the Amiga 600 itself:


I also received the standard Amiga 600 manuals with the machine:


So before I go any further with the initial clean, I want to make sure it works. Because this is a standard Amiga 600 (not upgraded yet) and I don't have a TV in my computer room, I need an external scan doubler to plug into the Amiga 600's video slot, which can then be connected to a TFT monitor via VGA cable.

I bought this external scan doubler below back in 1998, and it is still working well:


The scan doubler also has a inbuilt flicker fixer, which is great for interlace (flickering) screen modes on the Amiga 600.


The scan doubler is needed because a VGA monitor requires a minimum input of 31Hz to display anything. By default the Amiga outputs 15Hz from the video port, which is compatible with analog televisions available at that time.

The scan doubler doubles the output signal from the Amiga video port to the VGA standard 31Hz so it is possible to use a standard VGA TFT monitor to display. Having this means I don't need the old Amiga 1084S/1940/1960 CRT monitors, which are old, fragile, heavy and use a lot of space.


A similar result is achieved by installing an Indivision ECS expansion inside the Amiga, but that is a job for later. First I want to test it out.

Below is the Amiga 600 connected up, scan doubler attached to a TFT VGA screen, and powered on.


As a surprise this Amiga 600 has had the default Workbench 2.05 ROM chip replaced with an Amiga 500 Workbench 1.3 ROM chip! This is why we see the old Amiga 500 V1.3 hand holding the disk prompt, rather than the v2.05 insert disk screen.

Fortunately I have v3.1 and 2.1 ROMS (and a ROM switcher) for the Amiga 600 from previous projects to install in this later. For now I located an original Workbench 1.3 disk, which booted perfectly to Workbench 1.3 as shown below:


The mouse included with the Amiga 600 (and shown in the photos) has a faulty left mouse button, but I have a spare new one so no problems to swap it out later:


You can see below that the Amiga 600 has just the standard 1MB RAM included with it, minus the memory needed to boot into Workbench:


Being a former demo scener and a big fan of Amiga demos, I then fired up Razor 1911 Voyage demo from 1991, which worked perfectly on the Amiga 600. Audio was crisp and both channels working well:


I will next get to grips with taking apart and fully cleaning the Amiga 600 inside out, before moving on to the next step!

Really glad to have an Amiga 600 again, but there is a long way to go before this Amiga 600 is where I want it to be, with many upgrades to come and all to be covered here in this blog.