Wednesday, 26 February 2014

Filesysbox NTFS with SATA HD on X1000 - Part 1

Today I wanted to take a look at the recently released Filesysbox NTFS support on AmigaOS4.1 on the AmigaOne X1000, available via AmiUpdate.


I plan to install a new 1TB SATA hard disk into the X1000, prepare the new NTFS partitions and fix up my AmigaOS system partition sizes at the same time.

The point of using NTFS partitions for me is that they can be read from Ubuntu and AmigaOS4, meaning that instead of having all my pictures, music and mods duplicated on two different disks (and having to update both everytime they change), I can use one partition both systems can access!

In Part 1, I will look at the AmigaOS4 side including prepping the NTFS partitions in AmigaOS4.

Next in Part 2, I will look at the swap over of the AmigaOS4 disks and the Ubuntu side accessing the new NTFS disk partitions.

One problem I hit quickly is there was not enough SATA power connections in the X1000 for another SATA Hard Disk.

Fortunately there are plenty of molex power connectors in the X1000, so I bought some very cheap molex to SATA power converters (3 pack) for AUD$3 from Ebay. Each cable converter splits off with two SATA power connectors:


I then installed one of the power converters into the X1000, ready for the new hard disk:


I then needed to mount the new 1TB hard disk into the X1000 hard disk caddy prior to pushing it into a spare hard disk bay. This arrangement is nice since it eliminates the need to screw the hard disk into the X1000 case, and allows easy removal. Here is the bottom view showing the 4 screws securing the caddy to the hard disk:


And the top view. I found it necessary to label the disks (near the end that is closest to the edge of the case) with what is on them since both the Ubuntu and AmigaOS4 1TB disks I have recently installed are the same brand, size and model of hard disk.


Below we can see the hard disk about to be slotted into it's new home in the X1000. I made sure to note the serial number of the hard disk before closing up the case - it means I can tell which Seagate hard disk is which in the AmigaOS4 Media Toolbox:


Once AmigaOS4 was booted, I ran AmiUpdate to install the new Filesysbox library, which is needed to get the NTFS partition support working under AmigaOS4. A reboot is needed after this is installed:


Having rebooted AmigaOS4, the new 1TB disk now needs to be prepared for use using the Media Toolbox utility, located in the SYS:System folder:


Once run, I selected the  sb600sata.device which then shows the SATA disks on the X1000 as below:


Now you can see why I needed to note down the serial number of the new hard disk - the Ubuntu hard disk is the same model, and because it is not readable by AmigaOS4, both have the same "not installed" status.

I needed to be careful to make sure I didn't wipe out my hard work building the Ubuntu installation. Serial number for the new disk was 9QJ3NFAT, so I selected this disk and clicked Install at the bottom left:


I then get the installation screen. I don't need to change anything here - just click OK - accept changes button:


I looked at the current AmigaOS4 hard disk (Western Digital) to check partitions I needed to recreate - namely BDH0 and DH0:


Now, the important part here is that you cannot have the same DEVICE names on different drives at the same time in AmigaOS4, so the new partitions I create on the new hard disk need to have different names.

This is so I can copy all the files to the new hard disk from the current one using the current AmigaOS4 installation. So I elected to name the new partitions BHD0, HD0, HD1, HD2, HD3.

BHD0 is a 100MB partition set as FastFileSystem type with Long Filenames enabled, with blocksize of 512. This partition will be used to put the amiga_boot.of file which is needed to boot AmigaOS4 on the X1000. (I covered this previously in a blog entry here when I installed a 500GB drive - which I have now removed to put this new 1TB disk in)

Next,  I created the new HD0 partition which will be the new AmigaOS4.1.6 system partition. On the current hard disk this partition is only 2GB and formatted SFS, and space is really becoming an issue of late. The limit of SFS partitions is 4GB, and SFS2 is over 1TB.

Both SFS and SFS2 partitions can be used as bootable partitions for AmigaOS4. NTFS cannot be used as bootable.

So I created the HD0 partition as 10GB SFS2 with blocksize of 512, and set as automount and bootable:


I then used the same settings (SFS2, 10GB, blocksize 512, automount) to setup HD1, which I intend to use to backup the AmigaOS4 system partition. I didn't enable bootable for this partition since it is a backup only.

For HD2 and HD3, I intend to format them as NTFS. This process was a bit tricky so I want to cover how to do this in case it helps you out.

I show HD3 as an example below when I first Add the partition, which defaults to Standard filesystem (click to expand):


 We need to change the Type from Standard filesystem to Custom filesystem, as below:


 You will see above that the Identifier section is no longer greyed out, and shows Identifier 444F5303 -> DOS\03.

This is not the correct type for NTFS - we need to change the Identifier section to read 4E544653. When you press Enter in the field, it will auto-populate the field to the right of -> with NTFS, as below:


 Once I click on Ok - accept changes button, I can then see the final partition layout for the new 1TB disk, showing the FFS2, SFS2 and NTFS partitions:


Note that the NTFS partitions need Automount unchecked. I did this but didn't update the screenshot to reflect it sorry (I realised much later!). AmigaOS4 cannot automount NTFS partitions - additional work is needed to mount them using mountlists - which I will cover shortly.

After I click on Ok- accept changes button, I  then go back to the initial SATA disk view in Media Toolbox. I then click on Save to disk:


It will prompt you to confirm if you really want to do this:


We can then see the new disk status is listed as Ready in Media Toolbox:


When we close Media Toolbox, we are prompted to reboot, which we need to do:


After the reboot we need to setup the NTFS mount lists, as the NTFS volumes are not mounted automatically in AmigaOS4.

To do this, run Media Toolbox again, select sb600sata.device, then select the new Hard disk. Then right click on HD2, select Profiles/Templates > Save RDB as Mountlist option.

It will then prompt you to choose whether this mount list is a DOSDriver for AmigaOS 2.1 (or later) or older format Mountlist for AmigaOS older than this. Of course we want the DOSDriver version:


It should automatically want to save into SYS:Devs/DosDrivers folder. Type the DEVICE name HD2 in this example (HD3 needs to be done too):


Now, I opened Notepad and edit SYS:Devs/DosDrivers/HD2 and SYS:Devs/DosDrivers/HD3. Add in the following lines:

FileSystem = L:NTFileSystem3G
Activate = 1
Control = "noatime"

These tell the system to use the new NTFileSystem3G driver to mount the partition, to activate the partition, and to prevent excessive access time writes to the volume:


As this point I have to sincerely thank Amigaworld.net forum member Sundown for pointing out some errors I initially did in this file. It was causing me some frustration!

After this another reboot is needed. This will then get AmigaOS4 to mount the NTFS partitions using the new driver.

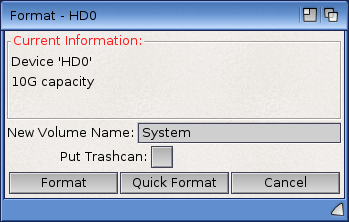
I then Formatted HD0 and HD1 as System: and OSBackup: respectively (using Right click title bar > Icons > Format disk... and unchecking the Put Trashcan option as it is not needed. 


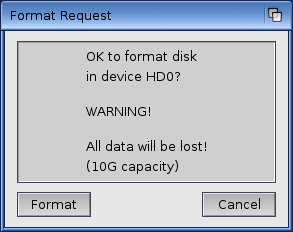
AmigaOS4 then checks to make sure we want to do this since this will wipe any data on the drive. It is not formatted yet so no issue:


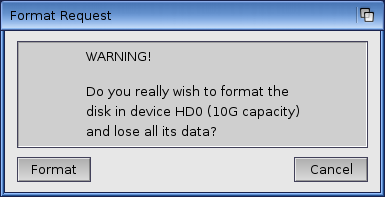
And another check is done, just to make doubly sure:


Once this was done this left the NTFS volumes to be formatted, as shown below:


I can format the HD2 and HD3 volumes the same way:


When completed, I can show the Icon Information on each of the two new NTFS volumes, showing the NTFS Filesystem is being used for these - success!


Interesting thing I noticed is the creation date of the disks is not todays date, but the default beginning date for AmigaOS. Not sure why this is...

Anyway, next came the rather long task of copying all my data over to the new partitions in preparation to changeover the old AmigaOS hard disk for the new one....

I can then boot Ubuntu to check the other side to make sure I can access these new partitions from the other side.

Since this copy is happening right now and will have to be left overnight to finish, I will cover the swap over of the AmigaOS disks and Ubuntu accessing the NTFS partitions another day in Part 2.

I hope the guidance on prepping NTFS partitions under AmigaOS4 is helpful - I couldn't find any documentation on this, but there is some here now for others to use if it useful! :-)


Tuesday, 25 February 2014

iPod Nano on X1000

One of things I was curious about in recent times is whether you could connect a current generation iPod Nano to the AmigaOne X1000 to copy songs from and to it - and yes, it can.


There is of course some work to do before this will work though - how much depends on whether you use your iPod on a Mac or PC, and whether it is enabled for disk use or not.

In my case, I use it on a Mac and it was not enabled for disk use either. This means it won't work as is on the X1000. If you plug it in as a Mac disk on the X1000, it is picked up in USB but is not displayed as an icon on the desktop (click to expand):


The Mount commodity (accessible from CTRL-ALT-M) allows us to see the iPod is mounted as USB0: but the filesystem is not recognised:


I tried going to it from the Shell but no go:


So, to fix this I needed to connect it to iTunes on a Windows PC and restore the iPod firmware to Windows and enable disk use. If you already use your iPod on a Windows PC then you don't need to do this step and can skip it! The steps are simple enough when you connect the iPod to Windows:


When you click cancel on Formatting it, and then click on Restore iPod it prompts to remind you everything will be wiped. It then downloads the Windows firmware and installs it:


When done the iPod prompts to walk through the initial setup:


When done you get the usual iPod info screen as below - I then synchronised quite a few songs to it:


Having done this, I ejected it and connected it back to the AmigaOne X1000:


The iPod then appeared as a disk icon on the desktop - success:


I then browsed through the iPod folders to find the music files, strangely named within folders in no particular order.

I guess there is a index somewhere that links them together within the interface. I guess it is to discourage copying too - you can see the folder structure in the screenshot below (Click to expand):


I dragged and dropped the mp3 files into AmigaAmp3 and played them directly from the iPod on the X1000! Note the weird names do change to the song title when played, as below:


I then copied an mp3 from the X1000 into one the folders on the iPod and then disconnected the iPod from the X1000. When I browsed the music on the iPod, I found the file I copied across and it played on the iPod Nano with no problem! Happy days!


I think there is probably no way to create playlists via the X1000, which is unfortunate but then iPods are setup to do this with iTunes exclusively...maybe someone out there knows how to do this!

But, regardless, the good news is with a little bit of work (as a Mac user), and no work (as a Windows user) you can use your iPod Nano with the X1000. :-)


Thursday, 20 February 2014

A-Eon Ubuntu Remix on X1000 - Part 2

Today I am continuing my look at Ubuntu Remix released by A-Eon for the AmigaOne X1000,  in this part 2 I am focusing on the installation of Ubuntu onto the X1000.


If you missed Part 1 of my coverage of running the Ubuntu Remix Live DVD, you can read it here.

Before you install Ubuntu Remix onto your X1000, it is important to prepare a CF card and (in my case) a separate HD to run Ubuntu.

Your CFE BIOS also needs to be updated if you are one of the "First Contact" X1000 owners who has never updated the CFE since purchase. Mine has already been updated previously - A-Eon has a full guide on how to do this process on their website for registered X1000 owners to download.

The CF Card preparation for linux was not covered in the install guide for the Ubuntu Remix, which was annoying as it is an essential part of the installation process. I have covered this part in some detail here to help other people who may encounter the same issue.

My Hard disk is a 1TB SATA disk, which I mounted into the X1000 caddy so it could be slid into one of the spare HD bays in the X1000, ready to be formatted and partitioned for Linux use:


The X1000 has a CF slot on the motherboard, which is accessible from the CFE BIOS to allow the system to boot Linux. It is necessary to load the Linux Kernel files onto the CF card before trying to boot linux from the X1000. Here is my 8GB CF Card installed on the X1000 motherboard:


A-Eon has made available the Ubuntu Linux kernel zip files on their website, which you need to have access to as a user name and password is needed to download the relevant files - I organised this as part of the purchase of my X1000 in 2012. Other linux distributions tailored for the X1000 (Mint PPC, Fedora, Debian) are also available to download from this website (click to expand).


Being the cautious type I download the Stable 3.10.15.1 Linux kernel zip file for the CF card. If you have a CF card reader on another computer you can extract the contents to the CF Card (as long as it is formatted as FAT) and you will be ready.

In my case, I didn't have a CF card reader on another computer - all my other computers are SD Card readers only, so I had to use the X1000 to do it. To make things more fun the CF Card I have bought is 8GB, rather than 4GB (the maximum size for a FAT partition). So it was necessary to delete the existing FAT32 8GB partition pre-formatted on the CF card and create a new 4GB FAT partition on it before I could copy the files to it.

The bad news is that the CF card cannot be read from AmigaOS4 on the X1000, but the good news is it can be reached from booting the X1000 from the Ubuntu Remix Live DVD. You can run the GParted utility in the Live DVD Ubuntu Remix environment to then prepare the CF Card. To find this utility, click on the Ubuntu icon in the top left of the dock, and in the search field type in GPart and it should come up - just click to run it.

In my case, the CF Card was device /dev/sdc - it may be different for you depending on how many hard disks are in your system. By default GParted showed the AmigaOS4 hard disk /dev/sda which is not readable from Linux, as below:


Select the /dev/sda button in the top right corner to select other hard disks in the system, and the option for /dev/sdc will then appear, when selected it will show the current layout of the CF Card:


As mentioned I needed to delete the 8GB partition as the CFE can only read FAT formatted CF Cards. This restriction means the CF Card must have a 4GB maximum partition, and 4 GB of wasted space!

Right click on the /dev/sdc1 partition to delete the CF Card partition - your CF card may be located on a different device location, so please make sure you have the correct partition before deleting it!

Once the CF Card existing 8GB partition was deleted in GParted, and the new 4GB FAT16 (FAT) partition was created, click the checkmark icon to apply the changes requested, and we now have a CF Card that can be read by the CFE:


While in GParted, I also prepped the new 1TB hard disk for Linux, which for me is located in /dev/sdb. Specifically at this stage I just installed the Partition Table so it was ready to be partitioned from within the Linux Installer. This option is available from the Device Menu in GParted. Note that doing this will wipe all data from the disk. Be very sure you have the right disk before doing this:


Now close GParted, as now we need to download and copy the linux kernel files to the CF Card before starting the Ubuntu installation. If you don't do this step, you will not be able to boot your new Linux after the installation is completed.

As mentioned, you need to download the linux kernel from A-Eon's download section of their website, then extract the files from the zip to the CF Card, which should then appear on the CF Card as below:


Ok, so now we are ready to start the Ubuntu Linux installer from the Live DVD, available on the Ubuntu desktop:


Make sure you select Something else under the Installation type, this allows you to choose where to install Ubuntu. Otherwise you may lose important data from AmigaOS4 partitions which will be destroyed and adjusted for Ubuntu - I have heard some horror stories of people who have done this by mistake:


Next I partitioned the 1TB disk I installed in the X1000 for Linux, which allowed 4GB swap space partition (as recommended) and the rest as one Linux ext4 partition:


The Installation guide from A-Eon explains the remaining steps very well here (including partitioning), with screenshots too, so I don't need to cover that much of the initial install here.

Once the Installation is completed, you will be prompted to reboot at this time, with the DVD ejected prior to rebooting of the X1000. It is important to press F to access the CFE on the system reboot, so we can setup the new boot menu for Ubuntu Linux.

Again, A-Eon's install guide explains what you have to do here quite well, the root in my case being /dev/sdb1:


I checked that Ubuntu booted by manually booting Linux from the CFE (replacing usbdisk0 with cf0 and vmlinux-3.10.15 with vmlinux-3.10.15-ubuntu as per the extracted file put on cf0 earlier.

I then added the extra menu entry into the CFE so I can now choose to boot Ubuntu 12.04LTS when the system turns on, instead of typing the boot commands into CFE each time:


Once booted we get the initial Ubuntu 12.04LTS Desktop, with the AmigaOne background image created especially for this distro - nicely done (click to expand):


As this is a new install, there are of course a lot of patches and updates to install to bring the build of Ubuntu up to date, 255 updates to be exact:


Of course I was keen to install some other interesting software on the new X1000 Ubuntu install, so I headed to the Ubuntu Software Centre icon in the Dock to take a look at what is available to install.

The selection in there is reduced a bit from the Intel versions of Ubuntu, as not all applications written for Linux have been written to support PowerPC linux distributions (Google Chrome web browser is an example). Nonetheless there is still plenty to try out, most are free:


As with the Apple AppStore or Google Play Store, the Ubuntu Software Centre makes installing software in Ubuntu very simple, click to Install to install a program - click Remove to uninstall it.

This is definitely much better than the old "compile the executable yourself" era of Linux I know well.

We will have a taste of this AppStore functionality on AmigaOS4 with A-Eon's upcoming AmiStore for AmigaOS4. Looking forward to it.

I found that it is necessary to adjust the dock located System Settings > Brightness and Lock and Power areas to fix an black screen issue with the power settings in Ubuntu - basically I turned off the suspend and turn monitor off functions to fix it:


Having done this, I copied across data from my other computers - music, mods, videos, and photos to the Ubuntu disk so I could try some stuff out on the X1000 Ubuntu install.

In Ubuntu there is a photo management software called Shotwell. It took a long time to import my photos (but to be fair I have almost 25,000 photos!), but works quite similarly to most photo management software I have used over the years. For iPhoto users like myself the interface is quite similar to navigate (click to expand screen grabs for more detail):


Rhythmbox is the music program in Ubuntu - I found it is necessary to turn off the UbuntuOne plugin in Rhythmbox to avoid occasional crashes in this software (a known bug), although it still seems to cause other issues when open - I will investigate it more later.


Being an AmiCygnix user under AmigaOS4 on the X1000, I have already used Audacious music player, so I was happy to download it and use it under Ubuntu on the X1000 as well:


I mentioned earlier about the Ubuntu dock icon search tool to locate applications that are not on the dock. You can run them directly from the search results, and also drag them into the dock to make finding them easier. Note that too many programs in the dock makes it slower to navigate - so I suggest putting just the programs you regularly use in the dock (click to expand).


From here I ran Battle for Wesnoth - a game that has also been ported to AmigaOS4 too. As you would expect it runs well under Ubuntu:


I next tried out playing videos on Ubuntu. Using VLC, SMPlayer and the default movie player I found that none can play back 720p or 1080p videos without dropping many frames and audio issues too. This is the same issue as AmigaOS4 has and seems to be the same cause - the incomplete video drivers.

Fortunately using SMPlayer and MPlayer (download these from the Ubuntu Software Centre) you can get acceptable playback of 720p videos, but 1080p is still not able to play back well. I use SM Player to watch videos under Ubuntu (it needs MPlayer installed to play the videos), but some configuration is needed to get it to play 720p videos properly - I will show what I did for this below.

So it is possible - below is a 720p mp4 video file playing back fine under Ubuntu SMPlayer on the X1000 (click to expand):


 To get 720p videos to play properly in SMPlayer go to the Preferences menu option in SMPlayer, and select the Performance option on the left of the window. Initially it looks like this:


I then adjusted the setting to disable the H.264 Loop filter for HD videos, and changed the number of threads for decoding from 1 to 5 (ultimately I used the maximum setting of 8 for best performance), as shown below:


I then tried out a few different 720p or less resolution mp4 and mkv videos which all worked well on the X1000 under Ubuntu. I include the video information so you can see the video resolutions of the videos tested (click to expand):


Although I was disappointed that 1080p videos don't play back properly yet, I expect when the video drivers are improved this should get better (same as on AmigaOS4).

Speaking of similarities to AmigaOS4, Ubuntu PPC also does not have Adobe Flash, which means that YouTube cannot play back videos in Firefox. There is however a ViewTube plugin in Firefox installed by default that allows you to playback YouTube videos within the browser.

However, I found the performance of this playback was not very good. However I didn't play with it for long so I don't know if there are ways to improve it (as I found a way to do in AmigaOS4 previously) (click to expand):


Update 22/2/14: I have been advised that there is an included program called MiniTube which works much better for searching and playing YouTube videos under Ubuntu. I tested it, and for 360p videos it works very well. Higher 720p and 1080p don't work so well, but part of that is due to my ADSL internet connection which has issues streaming 1080p from the internet. Your mileage may vary!

There is plenty more yet to explore with Ubuntu, and far too many applications to cover in this blog entry! Hopefully if you are interested in trying Ubuntu Linux on your X1000, this two part blog entry about it should hopefully give you some idea of what to expect.

If you enjoy playing with this Ubuntu Remix 12.04 LTS build from A-Eon and want to even explore more in the world of linux on the X1000, you can also try some of the other Linux builds also released on X1000 like MintPPC, Debian, Fedora, etc, from A-Eon's download page.

There is really a lot of active work happening right now to get various linux distributions working well on the X1000!

If you don't have the Ubuntu Remix DVD yet, it is probably the easiest way to get linux onto your X1000.